
FUZIX: Why Bother?
The idea behind FUZIX is to recreate an old-school UNIX that can run on 8-bit (Z80, 6502, 6809) or 16-bit (68000) architectures and provide them with a complete operating system: process management, files, input/output, etc. It is also a way to go back to the origins of UNIX with a frugality and efficiency required by the low power of the target hardware platforms.
Testing FUZIX was therefore an attractive prospect, but it was still necessary to find a hardware platform to run it on. There is a retro computing computer based on the Z80, the RC2014, but it is not as easy to find the equivalent for my favorite CPUs: 6809 and 68000.
So when I learned that a port of FUZIX to Raspberry Pi PICO had been done by David Given, I promised myself to try it. After a few weeks, the port information was updated and the pinout and installation procedure started to circulate. The information was even picked up in an article on the official Raspberry website.
The initial tests based on the pre-built images were conclusive, but I promised myself to come back to it as soon as I had some time. It took longer than expected, but I took advantage of a few days off to try again.
First Try
I downloaded the sources from the project repository now that the PICO port is integrated into the main branch.
In the Makefile file I changed the target,
TARGET=rpipico
before starting the compilation.
Warning: the files and results are not necessarily where you expect them to be: you have to do some searching.
Once the compilation was finished, I copied the UF2 files (fuzix.uf2 and filessytem.uf2) to the PICO, put it in program loading mode by pressing the BOOTSEL button.
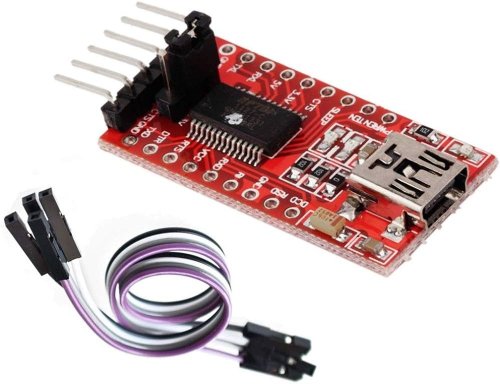
It remains to reach the PICO serial console to get the display. The connection is made via a USB port, via the very common FTDI USB/serial converter component.
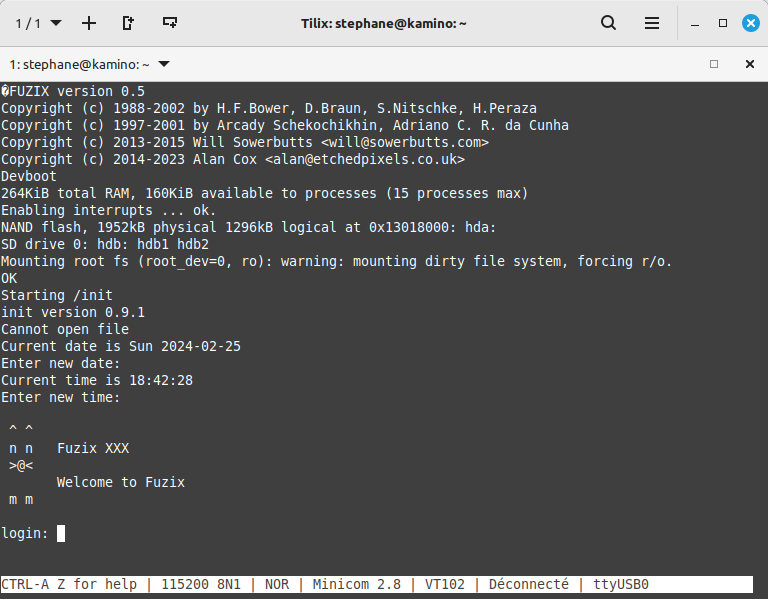
The last step is to use a serial terminal emulator. I chose minicom. The USB port is seen as /dev/ttyUSB0 or /dev/ttyACM0. The command is then:
minicom -D /dev/ttyUSB0
To be able to enter commands, you must disable the hardware flow control of the serial port. This is a parameter to be modified in the Minicom configuration under:
Configure Minicom (O key) > Serial port setup > Hardware flow control: No
The login banner is finally accessible:
What’s Next?
The deployed environment already allows for good testing, even if in practice we spend more time looking at the source code than actually using the operating system. It remains to use the SD card for storage. That’s another story.